Author

admin

Browsing

‘Work from Home. Earn Money. Create Your Future.’

Upwork has emerged as a leading freelancing platform, connecting clients with talented freelancers worldwide. In this comprehensive review, we delve into the platform’s features, user experience, payment system, and more, to provide you with a thorough analysis of Upwork.
1. Upwork is a work from home solution:
Upwork is a reputable platform that enables individuals to work from home and seize money-making opportunities. It connects freelancers with clients worldwide, facilitating remote work and providing a flexible earning avenue. There are more and more works available for work from home seekers. So you just use it,  and make money with your efficiency.

2. Vast Pool of Talent:
One of Upwork’s biggest strengths is its extensive pool of freelancers. With millions of registered professionals covering diverse fields, clients can find talent for a wide range of projects, from writing and graphic design to programming and marketing.

3. Robust Freelancer Screening Process:
Upwork maintains a stringent screening process to maintain the quality of freelancers on the platform. Freelancers are required to submit their portfolios, complete skill tests, and provide work history, allowing clients to make informed hiring decisions.

4. Communication and Collaboration:
Upwork offers various communication tools, including real-time messaging, video calls, and file sharing. This facilitates seamless collaboration between clients and freelancers, ensuring effective project management and clear communication throughout the work process.

5. Payment System and Escrow Services:
The platform’s built-in payment system provides a secure and reliable way to handle financial transactions. Upwork offers options for hourly or fixed-price projects, with automatic time tracking and escrow services. This provides a level of financial security for both clients and freelancers.

6. Upwork Fees and Pricing:
While Upwork provides a valuable platform, it’s important to note the fee structure. Upwork charges a percentage fee on each transaction, which can vary based on the freelancer’s earnings and the type of project. While this is a consideration, it is balanced by the convenience and access to a global talent pool that Upwork offers.

7. Review and Rating System:
Upwork’s review and rating system plays a crucial role in maintaining transparency and accountability. Clients can provide feedback and rate freelancers based on their performance. Likewise, freelancers can review their clients. This system helps build trust and assists users in making informed decisions when hiring or accepting projects.

8. Dispute Resolution:
In the event of conflicts or disagreements, Upwork offers a dispute resolution process to help facilitate fair resolutions between clients and freelancers. This adds an extra layer of security and ensures that conflicts can be addressed professionally and efficiently.
Conclusion:
Upwork has established itself as a reliable and effective platform for connecting clients with skilled freelancers worldwide. With its user-friendly interface, vast talent pool, secure payment system, and transparent review system, Upwork provides an exceptional platform for businesses and freelancers to collaborate on a global scale.

While there are associated fees and considerations to keep in mind, the benefits of access to top-tier talent, streamlined project management, and secure payment processing make Upwork a valuable tool for individuals and businesses alike.

Ultimately, Upwork offers an efficient and reliable solution for companies seeking freelancers and freelancers looking for diverse work opportunities. By leveraging the platform’s features and adhering to best practices, users can navigate the world of freelancing with confidence and achieve successful outcomes.

Start your freelance journey on Upwork today and unlock a world of opportunities!

Here are the download links for the Upwork mobile app:

Work from home, earn money👇

Download For IOS
Download for Android

Click on the respective links above to be redirected to the Upwork app page on the Apple App Store or Google Play Store. From there, you can download and install the Upwork app on your iOS or Android device.

Once you have installed the app, you can log in to your Upwork account or create a new account if you don’t have one already. Enjoy the convenience of managing your freelance work directly from your mobile device with the Upwork mobile app!

Introduction:
Welcome to today’s blog post, where we’ll explore actionable strategies to boost your website’s ad revenue. Whether you’re a seasoned website owner or just starting out, implementing these proven techniques can help you maximize your RPM (Revenue Per Mille) and increase your earnings from Google ads. Let’s dive in!

1. Optimize Ad Placement:
Strategic ad placement plays a crucial role in generating higher ad revenue. Experiment with different positions on your website, such as above-the-fold, within content, or in sidebars. Test various layouts and monitor user behavior to find the optimal placement that balances user experience and revenue generation.

2. Utilize Ad Formats Wisely:
Different ad formats, such as display banners, native ads, or video ads, have varying levels of engagement and revenue potential. Test and analyze which formats perform best for your audience and niche. Consider utilizing responsive ad units to ensure ads are optimized for all device types and screen sizes.

3. Leverage Ad Networks Effectively:
Diversify your ad network partnerships to maximize your revenue potential. Google AdSense is a popular choice, but exploring other networks like Media.net, Ezoic, or Sovrn can help increase competition and yield higher RPMs. Monitor performance metrics and experiment with different networks to find the best mix for your website.

4. Improve User Engagement:
Enhanced user engagement leads to longer website visits and increased ad impressions. Focus on creating compelling content that captivates your audience, encourages social sharing, and drives repeat visits. Engage users with interactive elements like quizzes, polls, or surveys that keep them involved and boost ad views.

5. Targeting and Personalization:
Implement targeted advertising to display ads relevant to user interests and preferences. Utilize behavioral tracking and retargeting techniques to serve ads based on users’ previous interactions with your website. Personalized ads are more likely to capture users’ attention, leading to higher click-through rates and increased revenue.

6. Monitor Performance and Optimize:
Regularly analyze performance metrics like CTR (Click-Through Rate), CPC (Cost Per Click), and RPM to identify areas for improvement. A/B test different ad variations, placements, and strategies to understand what resonates best with your audience. Continuously refine your approach to ensure optimal ad performance and revenue generation.

Conclusion:
Boosting your website’s ad revenue requires a strategic approach and a willingness to experiment. By implementing the strategies discussed in this blog post—such as optimizing ad placement, leveraging ad formats, utilizing ad networks effectively, improving user engagement, and embracing targeting and personalization—you can significantly increase your RPM and maximize your earnings from Google ads. Remember to monitor performance, analyze data, and adapt your strategies accordingly to continuously improve your ad revenue. Here’s to your success in driving higher revenue through optimized ad monetization!

Motor Vehicles Department established by the Government of Kerala for the purpose of carrying into effect the provisions made under the Motor Vehicles Act 1988, considering the development and changes in the Road Transport Technology, Pattern of passenger and freight movements, development of road networks in the state and particularly the improved techniques in the motor vehicles management.

SMART MOVE – is the software developed by the National Informatics Center under the requirement put forward by the Motor Vehicles Department, Kerala. The power of the software is that fees, tax, cess, and application related to driving licence, conductor licence, transport & non-transport vehicles, permits, driving school licences can be accepted at any counters provided in the Regional/Sub Regional Transport Offices. The citizen arriving office need not search for various counters for various services. Various Check Posts under the department are powered by SMART MOVE- CHECK POST, another software developed by NIC by the requirement of Motor Vehicles Department, Kerala. Here all services required by vehicle owners/drivers rendered within a minute!


The Motor Vehicles Department is regulated by the Government of Kerala in terms of policy formulation and its implementation.  The Department is administered by the Transport Commissioner who is the Head of Department.

The main functions of the Department are:

Enforcement of the Motor Vehicles Act and Rules

Registration of vehicles

Collection of taxes and fees

Rendering services like grant of driving licences, issue of certificate of fitness, grant of permits to vehicles, etc.

Apart from this more importance is also given to Road Safety measures and to the Control of Automobile Pollution.

Motor Vehicles Department is one of the significant revenue earning departments of the Government. Government has taken several measures to make the functioning of Regional Transport Offices more people friendly and efficient.

Agents and touts have been removed from the Regional Transport Offices.  It has not only helped to smoothen the functioning but also eradicated the evils of corrupt practices in offices. The common man is emboldened to approach the offices for legitimate service without aid and support of agents and touts.

Check Report Offence Details

Steps :

Enter the Registration Number

Click on the ‘GO’ Button

Your Check Report details will be displayed

If any serious mistakes other than spelling mistakes is found or your vehcile details you should contact the concerned RT/Sub RT Office immediately for correction.

Fill up additional requirements if any asked by the computer and click apply

You will  get an application Number and can take printout of full set of applications

Instructions for Online Payment

Step 1. 

Enter Vehicle Number

Then click the button “Submit”. The list Of Unpaid Charge memos will be displayed.


Step 2. 

Select the Charge memos you want to make payment.

Then click the button “Proceed To Pay”.  A Message Box will appear and click „Ok‟ to Continue


Step 3. 

Select Mode of Payment you want

If you select Internet Banking.  Select Bank


Then Click the button “Make Payment”. You will be directed to Bank website. Enter Necessary details there.

If you Select Debit Cards Then Select Debit Card Then Select Card Type Then Debit Card Number Then Debit Card Holder Name Then Debit Card Expiry Date Then Security Code.


Then Click on “Make Payment” Button. You will be directed to the Bank website.

Step 4. 

On submitting Necessary details you will be redirected to a screen

You can see the transaction Status (Success OR Failure) there.


Step 5. 

You can take the print out of the transaction by clicking “Generate Invoice” button

Then you will get the e-payment receipt. Keep this receipt for future reference.

Check Online (Parivahan Website): CLICK HERE

Check Online (Kerala Police Website): CLICK HERE

Check Online(Get Challan Details): CLICK HERE

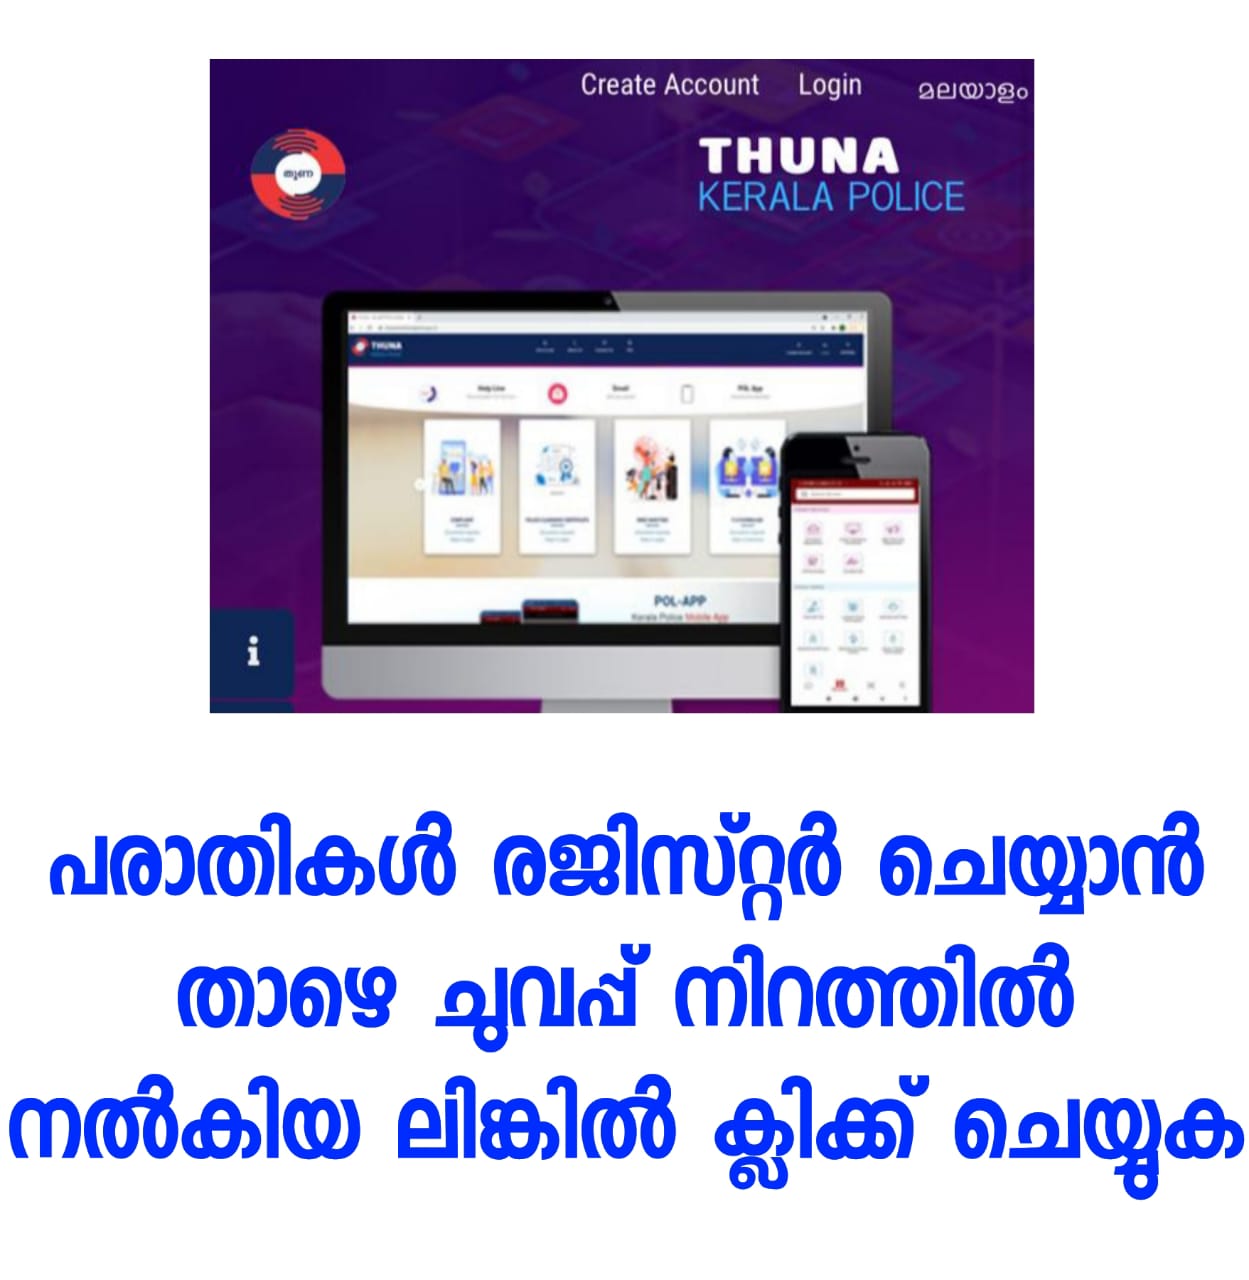
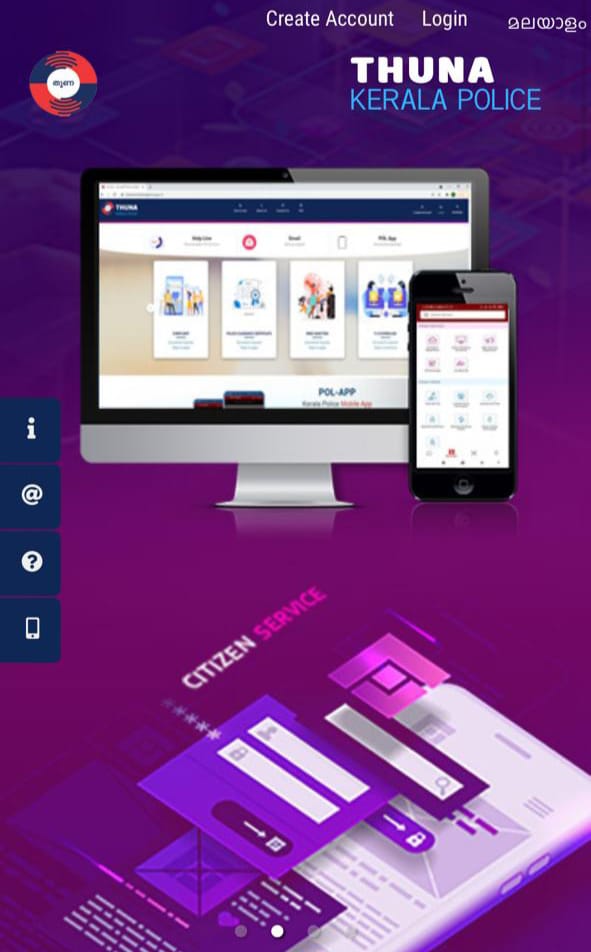
The Kerala Police Thuna Portal is an online platform that has been developed by the Kerala Police department to provide citizens with a convenient way to register complaints and seek assistance from the police. It is a commendable initiative that aims to bridge the gap between the police and the public, making law enforcement more accessible and efficient.

The Thuna Portal offers a user-friendly interface that is easy to navigate, even for those who are not tech-savvy. The registration process is straightforward, requiring users to provide basic information such as name, contact details, and a valid identification proof. Once registered, users can log in to the portal to access various services and features.

One of the key features of the Thuna Portal is the ability to file complaints online. This saves citizens the hassle of visiting a police station in person, especially for minor incidents or non-emergency situations. Users can provide details about the incident, attach relevant documents or evidence, and submit the complaint directly through the portal. This streamlines the process and ensures that complaints are registered promptly.

Another useful aspect of the Thuna Portal is the option to track the status of filed complaints. Users can log in to their accounts and view the progress of their complaints, including any updates or actions taken by the police. This transparency fosters trust and allows citizens to stay informed about the resolution of their issues.

Furthermore, the Thuna Portal provides access to important information and resources. Users can find contact details of police stations, important helpline numbers, and other useful guidelines related to safety and security. This empowers citizens to be more aware and prepared in dealing with various situations.

However, it’s worth noting that the effectiveness of the Thuna Portal relies on the timely response and action from the police department. While the portal itself is well-designed and user-friendly, it is essential for the police authorities to ensure that the complaints are addressed promptly and efficiently. Regular monitoring and follow-up mechanisms should be in place to maintain the credibility and effectiveness of the system.

In conclusion, the Kerala Police Thuna Portal is a valuable tool that enhances the accessibility and convenience of police services for the citizens. Its user-friendly interface, online complaint filing, and tracking features are commendable. With effective implementation and timely response from the police department, the Thuna Portal has the potential to improve the overall experience of citizens in their interactions with law enforcement agencies.

Step-by-Step Guide to Using Kerala Police Thuna Portal:

1. Visit the Kerala Police Thuna Portal website. You can access it through your web browser on a computer or mobile device.

2. Create an account. Look for the “Register” or “Sign Up” option on the portal’s homepage. Click on it to start the registration process.

3. Provide your details. Fill in the required information such as your name, contact number, email address, and a valid identification proof. Follow the instructions provided to complete the registration.

4. Log in to your account. Once you have registered successfully, use your credentials to log in to the portal.

5. Navigate the portal. Familiarize yourself with the various sections and features available on the Thuna Portal. You can find options like “File Complaint,” “Track Complaint Status,” and “Useful Information.”

6. File a complaint. If you want to report an incident or seek assistance, click on the “File Complaint” option. Provide accurate details about the incident, including date, time, location, and a description of what happened. If you have any supporting documents or evidence, you may be able to upload them as well.

7. Submit the complaint. Review the information you have provided and ensure its accuracy. Once you are satisfied, submit the complaint through the portal.

8. Track the complaint status. If you want to check the progress of your complaint, go to the “Track Complaint Status” section. Enter the necessary details, such as the complaint number or your registered contact information. The portal should provide you with updates on the status of your complaint, including any actions taken by the police.

9. Explore useful information. The Thuna Portal may offer resources such as contact details of police stations, important helpline numbers, and safety guidelines. Take advantage of these resources to stay informed and prepared.

10. Follow up if needed. If you feel the need to follow up on your complaint or require further assistance, you can use the contact information provided on the portal. Reach out to the relevant authorities or helpline numbers for further guidance.

Remember to use the Thuna Portal responsibly and only for legitimate purposes. Provide accurate information while filing complaints and ensure your communication with the police remains respectful and constructive. The portal is designed to enhance the relationship between citizens and the police, so make the most of it by utilizing its features effectively.

Thuna portal: https://thuna.keralapolice.gov.in/

KERALA POLICE APP: Click for Android

KERALA POLICE APP: Click for iPhone

Help Line
9497900567

Email
[email protected]


The Kerala State Electricity Board Limited has been incorporated under the Companies Act, 1956 on 14th January 2011 and started operations as independent company with effect from 1st November-2013.

The ‘Board’ consisting of the Chairman and the Members was the Supreme Governing Body and the Board was required to place before the State Electricity Consultative Council, constituted by the State Government by their notification EL3-9345 dated 21-2-1958 under section 16 of the Electricity Supply Act,1948 the annual financial statement and supplementary statements, if any, before submitting such statements to the State Government.


Over the last fifty nine years, the Board has grown from a total installed capacity of 109 MW to an installed capacity of 2823 MW and created Transmission and Distribution networks of over 10404 and 272480 circuit kilometers respectively. At present, the Board caters to the needs of over 1 crore  consumers spread over the urban and rural areas of the State. This incremental growth in the power system brought several changes in the characteristics of the system. The input cost structure and revenue  composition have undergone significant changes. Until the recent past, the  hydroelectric plants owned by the Board supplied a major portion of the  energy requirement of the state. However, after the promulgation of the  Forest Conservation Act in 1980, the implementation of new hydroelectric  projects had been seriously affected and more costly thermal energy had to be generated / purchased to meet the increasing demand.

Over the years, the consumption of heavily subsidised domestic sector has been increasing and now, it accounts for approximately 46% of the total energy consumed. As a consequence, the peak demand in the state has  increased to almost twice the off-peak demand. This forced more investment in the power system to meet the peak demand and purchase of  thermal energy from outside the State. But the capacity so created for  meeting the peak demand remains under-utilised during the off-peak periods.  The Board had been supplying electricity at lowest price in the country for  several decades. Because of this the Board had to resort to heavy borrowings to meet the  expenses. Though the Board was statutorily enjoined to function as a commercial  institution, it continued to function mainly with service orientation providing infrastructure facility, reliefs and concessions to other sectors like industry,  agriculture and so on. Now, the State Commission insist upon to perform strictly on commercial considerations.


The KSEB launched an official app is the latest offering and self service facility for customers from KSEB Limited which extends a host of features.

The features include:

• A personalised My Account for registered Consumers (Registration can be done in a minute on wss.kseb.in in new user registration section)

• Quick Pay facility for payments without registration

• New user Registration

• View/Edit consumer profile

• Manage up to 30 Consumer numbers in one user account

• Check Bill Details for past 12 months and download in pdf format.

• Check Consumption Details for past 12 months.

• Check Payment History for the past 12 months.

• Transaction History – Receipt pdf download

• View bill details & pay your bills using credit cards, debit cards, net-banking.

• Notifications alerting bill due date, payment confirmation etc.


All you need:

• A smart phone with Android Operating System (OS 5.0 or above).

• Internet connectivity like GPRS/EDGE/3G/Wi-Fi.

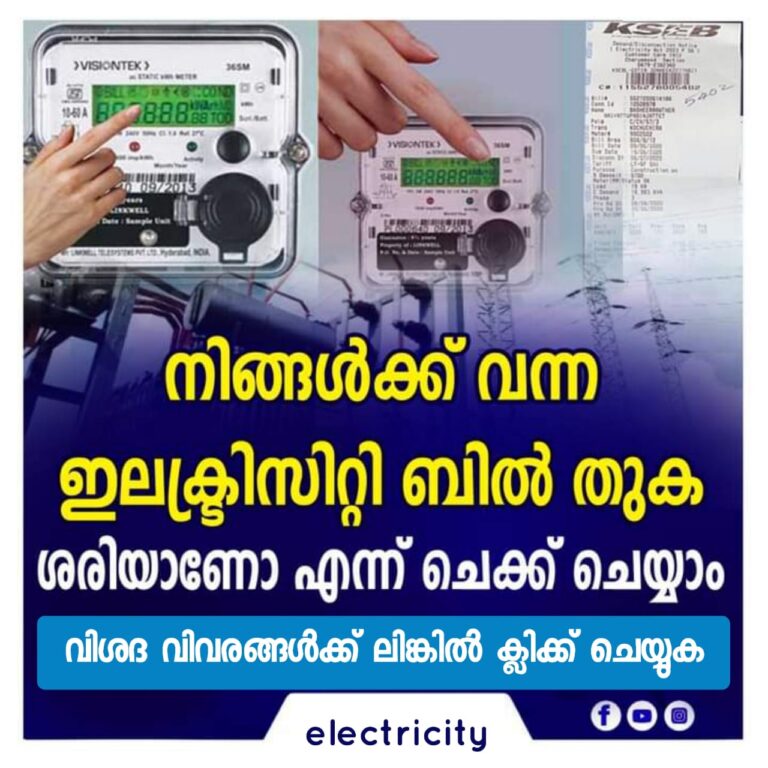
Electricity Bill Calculator

This calculator is intended for calculation of Electricity Bill amount based on units consumed.

Actual Bills may vary according to consumer status.

Fraction of rupees rounded off in final bill amount, is adjusted in Energy Charge/Fixed Charge.

Electricity Bill Calculator: CLICK HERE

DOWNLOAD : CLICK HERE

KSEB Official App

DOWNLOAD (Android) : CLICK HERE

Let’s face it, folks, nobody enjoys rummaging through dusty files for that one crucial document. Enter DigiLocker, a game-changer app from the Indian government that’s here to sort your document woes in 2024! But is it all hype, or is it actually worth your time? Buckle up, because I’m here to spill the tea on DigiLocker, from its pros and cons to how easy (or not-so-easy) it is to use.

The Good Stuff: Why You Should DigiLock Your Life

  • Say Buh-Bye to Bulky Files: Imagine never having to hunt for that missing birth certificate again. DigiLocker lets you store a bunch of important documents like your PAN card, driving license, and even school certificates – all digitally! It’s like having a secure online filing cabinet accessible with a tap.

  • Sharing Made Simple: Need to submit documents for a new job or that pesky loan application? Forget photocopies and snail mail! DigiLocker allows you to easily share your e-documents with authorized parties. No more wasting time and money on physical copies.

  • Government on Speed Dial: Gone are the days of endless queues for official documents. With DigiLocker, several government agencies issue documents directly to your DigiLocker. Talk about convenience!

  • Security Superhero: Worried about your documents falling into the wrong hands? DigiLocker uses top-notch security measures like Aadhaar authentication to keep your stuff safe. It’s like Fort Knox for your digital documents!

Not So Perfect, But Still Pretty Good

  • Limited Storage Space: While DigiLocker is free, the base storage space is a bit on the lean side. For those with a mountain of documents, you might need to upgrade to a paid plan.

  • Learning Curve: The app itself is user-friendly, but getting all your documents linked up initially can take a little time and effort. Don’t worry, it’s not rocket science, but a heads up for those who might be a tad tech-shy.

  • Relying on Issuers: DigiLocker’s awesomeness depends on government agencies and institutions actively issuing documents through the platform. Not everywhere is on board yet, so you might still need some physical copies in certain situations.

The Final Verdict: A Must-Have for Digital Natives

Look, DigiLocker isn’t perfect, but for anyone who wants to streamline their document management in 2024, it’s a no-brainer. It’s free, secure, and makes your life easier. Plus, with the government pushing for a more digital India, DigiLocker is only going to get better. So, ditch the paper chase and embrace the digital revolution with DigiLocker!

Bonus Tip: For a smoother experience, link your Aadhaar card and get familiar with the app’s functionalities beforehand. Trust me, it’ll save you time in the long run.

Download the DigiLocker app on your phone

(For download: click here Android, click here iPhone)

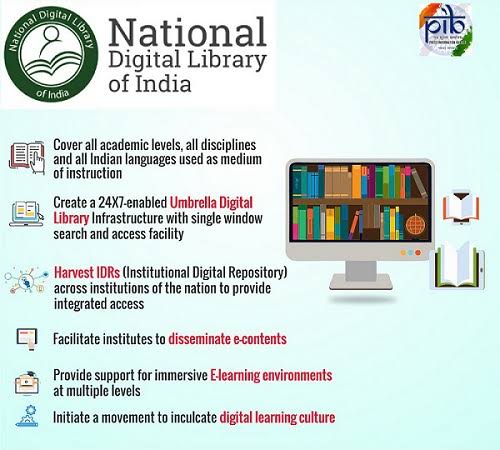
The National Digital Library of India (NDL) is a pioneering initiative that aims to digitize, preserve, and provide access to a vast repository of academic resources. Launched in 2015 by the Ministry of Education, Government of India, the NDL has rapidly grown into an invaluable platform for students, researchers, and the general public seeking quality educational content.

1. Access to Diverse Content:

The NDL hosts a diverse range of materials, including books, articles, thesis, manuscripts, audio lectures, and videos. These resources cover various subjects, disciplines, and languages, making it an inclusive platform for learners across India. With a user-friendly interface and robust search functionality, finding specific information within the extensive collection becomes effortless.

2. Extensive Collection:

The NDL houses a significant collection of over 40 million items, with contributions from various sources such as educational institutions, libraries, and cultural heritage organizations. This vast repository spans domains like science, technology, humanities, social sciences, and more. It acts as a comprehensive knowledge hub, empowering users to explore multiple perspectives and delve deeper into their areas of interest.

Open library📖

3. Open Access and Free of Cost:

One of the most remarkable features of the NDL is its commitment to open access. Users can access and download the resources free of cost, eliminating barriers to knowledge. This accessibility fosters a culture of continuous learning, enabling students and researchers, even those from remote areas, to benefit from high-quality educational materials without financial constraints.

4. Collaborative Effort:

The NDL’s success can be attributed to the collaborative efforts of numerous educational institutions, libraries, and content providers across the country. By pooling their resources and expertise, these stakeholders contribute to the expansion and enrichment of the NDL’s content. This collaborative approach ensures that the NDL remains a dynamic and evolving platform, constantly updated with new resources.

5. Personalized Features and Services:

Recognizing the importance of catering to individual needs, the NDL offers personalized features and services. Users can create accounts, save their favorite resources, bookmark pages, and even create virtual bookshelves for efficient organization. The platform also provides recommendations based on users’ interests and browsing history, enhancing the overall user experience.

The National Digital Library of India (NDL) stands as a remarkable initiative that democratizes access to knowledge. By harnessing the power of technology and collaboration, the NDL empowers millions of learners across India to expand their horizons, deepen their understanding, and pursue their educational goals. With its extensive collection, user-friendly interface, and commitment to open access, the NDL continues to be an invaluable resource in the digital age.

step-by-step guide to accessing the National Digital Library of India (NDL):

1. Visit the NDL website at https://ndl.iitkgp.ac.in/.
2. Explore the options and sections on the website.
3. Create an account (optional) for personalized features.
4. Use the search bar or browse categories to find resources.
5. Refine your search using advanced options.
6. Click on a resource’s title to access or download it.
7. Utilize additional features like saving, bookmarking, and organizing resources.
8. Provide feedback and consider contributing valuable resources.

Enjoy exploring the NDL’s wealth of knowledge!

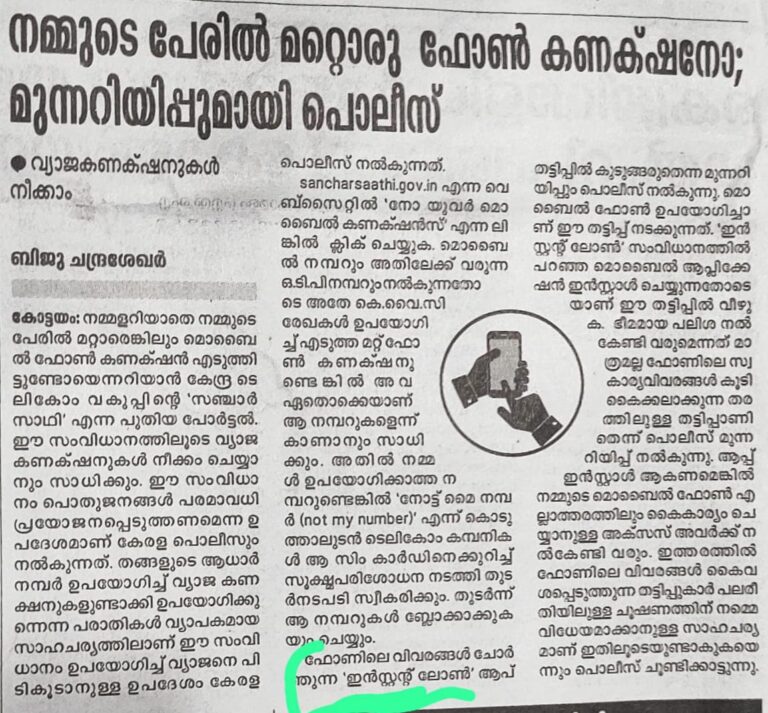
Hey there, digital warriors! In today’s world, keeping our personal info safe is like guarding a treasure chest full of gold. Especially with all this mobile phone fraud going around, it’s smart to keep tabs on how many SIM cards are linked to your Aadhaar card. Think of it as double-checking the locks on your digital fortress.

This blog post will be your guide to checking those SIM cards and making sure no one’s sneaking into your digital space. Follow these steps, and you’ll be a data security pro in no time!

Step 1: Head to Sanchar Saathi’s Secret Lair (Well, Website)
First things first, you gotta visit the Sanchar Saathi website. Think of it as a digital detective agency that helps you track down your Aadhaar details.  Sanchar Saathi Link Here

Step 2: Crack the Code (with a Secure OTP)

Once you’re there, you’ll need to log in using your mobile number. To make sure it’s really you, they’ll send a special code (OTP) to that number. Enter the code, and voila! You’re in.

Step 3: See Your SIM Squad (or Not-So-Squad)

Now you’ll see a list of all the mobile numbers connected to your Aadhaar card. Basically, it’s your SIM squad. Take a good look and make sure you recognize all the numbers.

Step 4: Spot a Stranger? Fight Back!

If you see any numbers you don’t know, don’t panic! You can fight back against fraud. Just click on the suspicious number and choose “This is not my number.”

Step 5: Fill in the Blanks (Like a Super Sleuth)

A form will pop up asking for the name on your ID document. Fill it out like a pro, providing all the details.

Step 6: Send the Bat-Signal (Report That Number)

Once you’re done, click “Report” to send a complaint. You’ll even get a special reference number, like a detective’s case file number.

Remember, staying on top of your Aadhaar-linked SIM cards is like having a security guard for your digital life. By following these steps, you can check for fraud and keep your info safe. Also, keeping your Aadhaar card and mobile number info up-to-date is super important. Think of it as keeping your fortress walls strong!

So, be a digital hero, protect your info, and enjoy a secure online experience!

CLICK HERE TO CHECK


Losing a mobile phone can be a distressing experience, not only due to the financial loss but also because of the personal data stored on the device. In India, where mobile phone usage is widespread, it is essential to know the steps to take when faced with such a situation. This blog post aims to provide a comprehensive guide on how to recover lost mobile phones in India, outlining various preventive measures, tracking options, and legal steps to increase the chances of recovering your device.

I. Preventive Measures

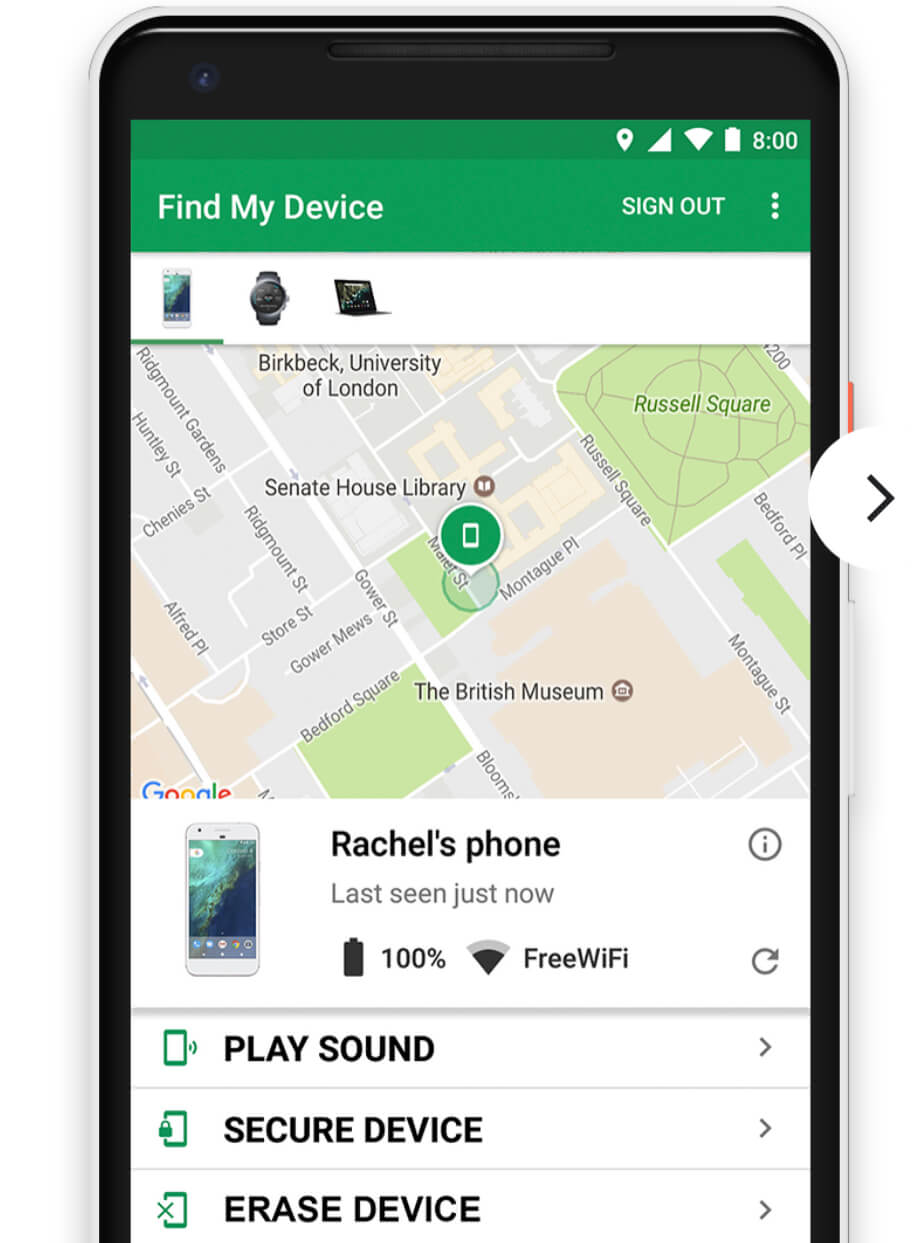
1. Enable Tracking Features: Before the unfortunate event of losing your mobile phone, it’s crucial to ensure that tracking features such as Find My Device (for Android) or Find My iPhone (for iOS) are enabled. These features allow you to locate, lock, or erase your device remotely.

2. Backup Your Data: Regularly backing up your mobile phone’s data ensures that even if the device is lost, your information remains secure. Consider using cloud storage services or manually backing up important data on a separate storage device.

3. Use Strong Device Locking Mechanisms: Implementing strong lock screen security, such as PIN codes, patterns, or biometric authentication, adds an extra layer of protection to your device. This makes it harder for unauthorized individuals to access your personal information.

II. Tracking Options

1. Contact Your Service Provider: Notify your mobile service provider immediately after discovering your phone is lost. They can help you track the last known location of your device using cell tower information.

2. Mobile Tracking Applications: Apart from the built-in tracking features, several third-party mobile tracking applications are available for both Android and iOS devices. These apps utilize GPS, Wi-Fi, and other technologies to track your lost phone’s location.

3. IMEI Tracking: Every mobile phone has a unique International Mobile Equipment Identity (IMEI) number. Registering this number with your service provider allows them to track and block your device if it is reported as lost or stolen.

III. Legal Steps (300 words):

1. File a Police Complaint: Visit your nearest police station and file an FIR (First Information Report) with all the necessary details about your lost mobile phone. Provide them with the IMEI number, mobile model, and any additional information that could assist in the recovery process.

2. Contact the Telecommunications Department: Inform the Department of Telecommunications (DOT) about your lost mobile phone. Provide them with the IMEI number and the FIR copy, as they can blacklist the device, making it unusable on any Indian network.

3. Monitor Online Marketplaces: Keep a close eye on online marketplaces where stolen phones are often sold. If you find a listing that matches your device’s description, report it to the police immediately.

  • Find My Device Service – Step-by-Step Guide

Find My Device is a powerful tracking service provided by Google for Android devices. Here’s a step-by-step guide on how to use it:

1. Enable Find My Device: Ensure that your Android device is connected to the internet. Go to the “Settings” app, tap on “Google,” and select “Security.” Look for “Find My Device” or “Find My Phone” and toggle the switch to enable it.

2. Accessing Find My Device: Visit the Find My Device website on any internet-enabled device or search “Find My Device” on a web browser. Alternatively, download the Find My Device app from the Google Play Store on another Android device.

3. Sign in to Your Google Account: On the Find My Device website or app, sign in using the same Google account that is associated with your lost device.

4. Locating Your Device: After signing in, Find My Device will attempt to locate your lost device. Once located, it will display the device’s approximate location on a map.

5. Ring, Lock, or Erase Your Device: Find My Device offers several options for managing your lost device. You can make your phone ring at maximum volume for five minutes, lock it with a custom message and phone number, or erase all data remotely if recovery seems unlikely. Choose the action that suits your needs.

6. Additional Features: Find My Device also allows you to switch to “Lost Mode,” which locks your device and displays a contact number on the lock screen. Additionally, you can view the battery status of your lost device to estimate how long it may remain operational.

Losing a mobile phone can be a stressful experience, but with the right preventive measures and prompt actions, the chances of recovery increase significantly. By enabling tracking features, backing up data, and implementing strong security measures, you can mitigate potential losses. In the unfortunate event of losing your phone, promptly contact your service provider, utilize tracking applications, and file a police complaint to initiate the recovery process. Remember to stay vigilant and monitor online marketplaces for any signs of your lost device. With a combination of these efforts, you can improve the chances of recovering your mobile phone and safeguard your personal data.

Certainly! Here are the download links for the Find My Device app:

For Android:
– Google Play Store: Find My Device

Please note that Find My Device is a built-in feature for Android devices, so you may not need to download the app separately. You can access it through the website as well.

For iOS (Find My iPhone):
– Apple App Store: Find My iPhone

The Find My iPhone app is specifically designed for iOS devices.

Remember, these links will redirect you to the respective app stores where you can download the app for your device.

Call anyone, Call any phone number worldwide at any time!

Free Call anyone, any phone number worldwide even if he doesn’t have this app!
Free call via WiFi or cellular data, no cell minutes used,no any fee.
Download this VOIP phone free call app & enjoy free calls global to any mobile & landline!

Completely FREE CALL
100% Free call, free global phone call. No contract, no hidden fees. 0 fees. Free all the time.

Call Global

Wi-Fi free Phone Call
No cell phone data plan? No problem. You can use WiFi to make free calls & texts.

Popular countries
Cheap or free international calls to over 200 countries!
Free calls to India & Free calls to Nigeria & Free calls to Mexico & Free calls to Pakistan & Free calls to USA & Free calls to UK & Free calls to Canada & Free calls to German, Free calls to UAE, Free calls to Saudi Arabia, etc.

HomeApps
Call any phone number worldwide
AdminWednesday, April 13, 20220

Call anyone, Call any phone number worldwide at any time!

Free Call anyone, any phone number worldwide even if he doesn’t have this app!
Free call via WiFi or cellular data, no cell minutes used,no any fee.
Download this VOIP phone free call app & enjoy free calls global to any mobile & landline!

Completely FREE CALL
100% Free call, free global phone call. No contract, no hidden fees. 0 fees. Free all the time.

Wi-Fi free Phone Call
No cell phone data plan? No problem. You can use WiFi to make free calls & texts.

Popular countries
Cheap or free international calls to over 200 countries!
Free calls to India & Free calls to Nigeria & Free calls to Mexico & Free calls to Pakistan & Free calls to USA & Free calls to UK & Free calls to Canada & Free calls to German, Free calls to UAE, Free calls to Saudi Arabia, etc.

HomeApps

Features
International Calling

to any mobile or landline numbers over 200+ countries supported!
– Free Call Pro allows you to make a international calls to anyone across the globe for free, even if the recipient has no Internet connection.

??Clear & Stable Calling
– Free call Pro dial away and make a high quality free phone calls with voice quality that is crystal clear, just like making phone calls from a landline!
Today, there are more and more people using VOIP to make global calls!

Why Use Free Call Pro

No Phone Bills

Calling via WiFi or 3G/4G/LTE network, you don’t get hit with expensive service charges. And best of all, you can pay as you go – there are no minimums, contracts or worries.

IS IT REALLY FREE?
No monthly fees! It is completely free!
HOW CAN ALL OF THIS BE FREE?
Check out some sponsored ads.
You can also buy points for call duration, if you are willing to pay

Unlimited FREE Call Credits
We have plenty of different offers on Free Call, just complete these simple offers and earn call credits to call non-Free Call users for FREE! You can receive free calling time easily by watching ads, completing tasks and inviting friends.

Download App